Thursday, May 8, 2014

Italian Beef Sandwiches

In my last post, I said that my crock pot and I have become friends. Two days ago, I used my crock pot to create something that made us so much more than just friends. It really solidified the kitchen bond that we have together. Crock pot + Jessica, forever.

I'd seen a few recipes for Italian beef on a few different websites. They were all a little varied, but more or less the same. So I made and executive decision on ingredients and technique as cobbled together from the various recipes I'd seen. This is what I used:
  • 3lb bottom round roast
  • 2 packets zesty Italian dressing mix
  • 1 cup of water
  • 1 16oz jar of banana peppers

I poured everything together and let it go all day while I was at work. It was on a low heat setting for 10 hours. By the time I came home with the rolls to serve it on, it was pretty much falling apart. I used a few forks to flake it apart into uniform pieces, and then we served the beef as sandwiches.

Tony was apprehensive about the peppers. I, on the other hand, completely love banana peppers. I used to get them on pizza and on sandwiches. We discovered that with all of the time and heat, the banana peppers more or less just disintegrated into the meat. Tony was initially really upset because he had just intended to pick the peppers out. This was not to be. But true to his word to try new things, he persisted and tried it. 


Even for all his protestations about the peppers, Tony really loved the sandwiches. When I asked him if we should make this again, he said, "If we don't have this again, I'll be pissed." The only thing I would do differently is to serve the Italian beef on a hard roll. I had intended to buy a crustier bread, but there was only softer bread left at the store. I'm completely certain that this would be awesome with a crusty bread. We served it with chips and dip because I didn't feel like making sides or salads. And, really, the best way to have an Italian beef sandwich is with chips. 

The flavor of this beef was incredible. It was tangy because of the vinegar in the banana pepper brine. The seasonings coupled with the pepper flavor and meshed really well. The meat was tender and having the extra juice to put on the sandwich was really great. This is easily the greatest creation my crock pot has ever given me. 

Wednesday, May 7, 2014

Ground Beef Stroganoff

Part of the search for making more food at home for Tony and I was also searching for foods that would be easy to make after a long day at work. As I've mentioned before, I work ten hour days now.  Interacting with people--sometimes very unhappy people--all day can be really taxing. Sometimes after a particularly long day, I just want to come home and drop.

It's because of that need to have things fast and still tasty that we've been perusing busy-family type recipes. Easy mom foods that can be put on the table relatively simply for the days when I don't feel like slow cooking a whole roast all day and eating it for a week just because I didn't feel like making dinner after work. Soccer mom food. It's not what I love because these foods, I find, can rely a little heavily on canned soups and other such crap. However, in a pinch, it puts a cheap and easy meal on the table and saves us from fast food hell.

We found a recipe for ground beef stroganoff on Pinterest (it's always from Pinterest, isn't it?) that pretty much embodied what we were looking for in an evening meal. It was simple and fast to make. The ingredients were more or less on-hand already. It was filling and delicious. When we made this recipe, it fed four of us, since we included our friends Melody and Stacie in the meal. We also had left-overs that I took to work later in the week.


We served this over egg noodles, which was a great way to go. I wish that we had incorporated more of a vegetable with this meal because it can be a little bit heavy without something to kind of offset the creaminess of the stroganoff. That said, there was nothing about the recipe itself that I would have modified.

Also, let's just take a moment to talk about kitchen failures. I've been playing around with breads, as I've mentioned in past posts. I decided for the stroganoff to try to make some quick biscuits using the recipe that I found in the cook book that came with my KitchenAid. They were disaster. They were hockey pucks. When they were warm, they still tasted good; when they cooled, they were hard and terrible. They were more trash than contribution to dinner, so the trash is where they ended up.

Even despite my biscuit failure, I'll try again to make biscuits. I think it'll be easier for me when I have a food processor. Right now, I have to make them with either the mixer or by hand, and I feel like biscuits are generally more successful with a food processor--at least, that's what all the recipes and the YouTube videos seem to say. The food processor will probably be my next kitchen purchase, but I'm not sure when that will be. Right now, I'll just do what I can with what I have and try not to get discouraged if it doesn't always go the way I plan. That's the best I can do!

Wednesday, April 30, 2014

Honey Mustard Chicken

I've mentioned in past posts that I have mixed feelings about mustard. Tony, on the other hand, really loves mustard. In fact, he loves spicy mustard. During our aforementioned scouring of the internet to find good recipes for us to try to keep us from fighting about dinner, we came across a recipe for honey mustard chicken. I love chicken and he loves mustard, so we thought it might be a good one to try.


Let me just say that this recipe is definitely a hit. The only thing that I did differently was to omit the rosemary sprigs in the baking process, which I only did because I didn't have any on hand. The chicken and it's sauce would probably be even tastier with the infusion of rosemary. The honey gives it a natural sweetness which isn't cloying and provides a nice balance to the tang of the mustard. The coarsely ground mustard adds an element of texture, and the onion and garlic base really add some wonderful flavor.

I cooked my chicken in a 9 x 13 casserole dish which I covered with foil for the first 20 minutes of baking, as required by the recipe. The cooking process keeps the chicken tender and the extra step of basting helps to keep it from drying out. Overall, this dish was a really wonderful combination of flavor and texture. I was initially a little bit worried about there not being enough sauce for the chicken, but there was plenty. In fact, you can see in the picture that there was more than enough sauce to be had.


I paired the chicken with sauteed green beans and potatoes. I tossed the green beans in olive oil and garlic powder before sauteing them. The potatoes I tossed in olive oil with salt, pepper, and minced garlic and baked along with the chicken. I kept them in for the same amount of time as the chicken, and they turned out perfectly.


I think this recipe was a really nice balance for us. We both really enjoyed it for our different reasons. The greatest triumph here was that there wasn't any part of the meal that Tony was opposed to. It was a really delicious recipe that I didn't have to spend any time modifying to suit his tastes, and that's a pretty big win for me. We will definitely be making this again.

Sunday, April 27, 2014

Fried Rice and Catching Up

Sunday used to be a work day for me. Since I have switched schedules, Sunday is back to being a relaxed day for me. This morning, since I didn't wake up in time to go to church, I made some coffee and decided to get down to business with catching up on blogging. I think it bears noting that I'm still enjoying the spoils of my earlier kitchen endeavors. And since it's Sunday, rather than having the usual kale smoothie for my morning, I opted to enjoy the fruits of my labors and chose my bread with some apricot preserves and yogurt with honey. It's become apparent that the effort is worth it when the results are so enjoyable, but, to be fair, neither of those projects were really that much effort. (Because I'm lazy! Are we seeing this theme yet?)

I've found that keeping up with the blogging when Tony and I have been trying so many new things is sometimes a little difficult with the schedule I keep. For a while there, he and I were in a bit of a food rut. We got sick of all the things we'd been making that were just cheap and easy fixes. All of it had culminated in a large fight, a night of Taco Bell, and a scouring of Pinterest together to find recipes we both agreed on to have a meal plan in place. Really, we should have been doing that anyway to keep our budget in line. Food boredom just happened to be the thing that motivated us to do it more than money. The point is all of it has resulted in a great deal of food I want to write about and not enough time do it. I try to blog in bursts and schedule them out or take my days off--like today--to catch up.

That said, I made fried rice on Friday. Tony really enjoys fried rice. Sometimes when we go out for Asian food, he simply orders chicken fried rice. It's such a simple dish that it's sort of a no-brainer to make it at home. The great thing about it is that it's a perfect day-after food. It can be made to use up left-over rice when you just don't feel like putting in that much effort. If you're like me, you can also do the rice the lazy way and use minute rice, which produces the same food in less time and effort. It may not be quite as tasty as regular rice, but it speaks to the laziness that lives in my soul. (If you're wondering, I comfort myself with the knowledge that, lazy as I am, I do still take the time to cook for myself and Tony. It's more than I can say for some of my peers who don't even really know how to care for themselves.)


I find that the difference between a delicious fried rice and mediocre one is in the oil. Sesame oil produces the best flavor. It has a nutiness to it that just adds tremendously to the rice. I find that fried rice that hasn't been made with sesame or peanut oil often has a blander flavor.


The fried rice we had on Friday was a joint effort. Tony had pre-made the minute rice and chopped the vegetables when I got home, so all I had to do was assemble and cook. We included the following:

  • Four servings of minute rice according to the package (we buy off-brand because we are lazy and cheap!)
  • 1/2 cup chopped onion 
  • 1/2 cup chopped celery
  • 1/2 cup chopped carrot (we approximated the veggies because we're also too lazy to accurately measure)
  • 1 6 ounce package precooked Tyson oven roasted chicken chunks
  • freshly grated ginger to taste
  • soy sauce to taste
  • 1 egg
  • 1-2 green onions.


I coated the pan with sesame oil, sauteed the vegetables first, and added the ginger and chicken chunks just until the chicken warmed up. Then, I added the rice and soy sauce, adding a little bit more sesame oil and evenly distributing the oil and soy sauce. Once it was all a uniform color, I added the egg. I mixed it all around until the egg was fully cooked and pieces of it were visible in the rice. I garnished it with the green onion. I drizzled a little more sesame oil on top of mine, and that was that! We had dinner.


I find that this a really great dinner for nights when intensive cooking is not called for. I had no desire to spend the majority of my day in the kitchen Friday night. So we made something quick and ate in the living room while watching gardening and cooking shows on Hulu. Secretly, Tony and I are really in our 60s, we just live in the bodies of a 32 year-old and a 28 year-old, respectively. Occasionally, we have nights like Friday where this is incredibly evident to both of us, and Friday was one of those nights. At least we had some good food.

Friday, April 25, 2014

Yogurt the Easy Way

Recently, I found a recipe on Pinterest that detailed how to make yogurt at home. Since I spend a great deal of money on Greek yogurt, I thought perhaps this might be a fun little project. I enjoy yogurt, but here's the caveat to my relationship with it: I really only like yogurt when it's thicker and creamier. My challenge with making my own yogurt was to make sure that it would be thick enough for me to actually like it. Sundry challenge to making my yogurt was that I'm super lazy. Like, seriously, really very lazy. It's almost embarrassing how lazy I am.

The process of making one's own yogurt really is just a process of heat and some time--as a lazy chef, I'm inclined to like it already. The nice part about a food like yogurt is that the bacteria really do all of the work for you. You just have to set up an environment for them that gives them the things that they want. I looked for methods that made that easy for me, and I found a technique using a crock pot to make yogurt that seemed perfect.

 I'm a busy person, and I do like to have a little time left in my day to enjoy a book or a movie with Tony. When I'm on the hunt for a recipe or technique, I like to rifle through various YouTube videos looking for something that's easy and appealing. When I can actually see the process, I can decide if it's for me or not. I used this recipe, which I found simple and user-friendly.

The start of the process--milk in  the crock pot.

Basically, you pour your milk into the crock pot and let it heat up to 180 degrees. It seriously could not have been simpler. I was a little surprised that it took as long as it did to heat up, and it did built up a skin that had to be skimmed off. For the most part, though, this really didn't take any effort on my part. I checked the temperature every now and again, and when it was up to temp, I turned it off. I let it cool back down to 115 degrees, added my store bought yogurt, placed the lid back on, wrapped it in a towel, and put it in the oven for overnight storage. It was pretty much as simple a process as it could be. When it was done, I spooned the yogurt into a paper towel placed over a strainer to give it a thicker consistency, placed the strainer over a bowl in the fridge, and let time take it's course.

After sitting for around ten hours, this is what it looked like. Yogurt!

I made my yogurt plain because I thought it would be nice to have the freedom to use it as a substitute for sour cream if I wanted to. However, given this recipe, it would be incredibly easy to add flavoring. It was so much better than store-bought alternatives than I ever could have imagined. It had a more pure, milk-like flavor. Because I took the time to drain out a lot of the whey, it was creamy and not as tangy as regular yogurt. (That's a big part of why I like Greek yogurt over traditional yogurt. It has a much milder flavor.) My crock pot yogurt was perfection with a little bit of honey, and I have a feeling that almond slivers would make it even more enjoyable since I love a little crunch with the smoothness of yogurt.

I purchased these jars specifically for yogurt storage.

I stored the yogurt in some 8 ounce Ball jars I bought. I also set aside a starter for my next batch. If I keep it up, I'll never have to buy store bought yogurt again, which would be just fine with me.

Yogurt and honey, a delicious combination!

This process was an incredible success. The texture and flavor of the yogurt I made were far more enjoyable than the yogurt that I've bought over the years. It's almost enough to make me wonder why anyone even bothers with store bought when making your own is so simple. If there's any project that I would encourage people to try of the kitchen projects I've done so far, it's definitely making homemade yogurt. The work was minimal and the product was of a superior quality considering what little work was put in. I will definitely be doing this again.

Thursday, April 24, 2014

Crustless Quiche and Brussels Sprouts

Wednesday and Thursday are my days off from work, so those are the days that I like to spend experimenting in the kitchen. I spend a lot of my down time looking at new ideas on Pinterest. I'm always looking for a freezer meal to make my life simpler or a super quick dinner I can throw together after a ten hour shift at work. Wednesday was my experiment day this week.

I suppose it was a little less of an experiment for me and more of an experiment for Tony. He had never had a quiche before, and they make such easy and affordable meals that they were always a go-to recipe for when we were growing up. In fact, I don't think that I ever truly appreciated my mother's Quiche Lorraine until I was an adult. Quiche is great because it's just an egg pie with various and sundry other ingredients. It's a great way to use up extra ingredients like ham from a major holiday--Easter ham, anyone?

The recipe I used was one I saw several years ago on NPR's website, found here. I'd made it before pretty much exactly as the recipe recommended with great success. Since Tony has some different tastes, I modified this just a little bit. I left out the cheese for obvious reasons and omitted the nutmeg because I didn't have any. I used a 10 ounce package of spinach instead of 16 ounces. I also added two extra pieces of bacon into the mix since there was no cheese and less spinach than the recipe called for. The lovely thing about quiche is that it gives you the leeway to make any modifications without ruining the general flavor that you're looking for.

I also made a quick saute of Brussels sprouts with balsamic and bacon. I only had frozen Brussels sprouts, but I wanted Tony to try them a different way because he told me that he doesn't like the way they taste. He had said that about asparagus, and I was able to change his mind about that. I wanted to be able to repeat that. Ideally, I'd have made this with fresh Brussels sprouts that I'd oven roasted before sauteing them with the balsamic and bacon, but it wasn't going to work out that way last night. And, to be honest, I just kind of wanted Brussels sprouts.


So I threw the bacon in the pan. I'd cut it into about one inch pieces with scissors, and just lightly sauteed it until it was done. It wasn't crispy. It was at that slightly rubbery stage. At that point, I added the steamed Brussels sprouts and the balsamic vinegar. I let that all cook together until the balsamic had been turned into a little bit of a glaze and had been absorbed. It had a lovely flavor, but the texture left a little to be desired because those frozen steamed Brussels sprouts can tend to be a little mushy. Tony liked the flavor, but he agreed that the texture wasn't great. It's good to know that he enjoyed the taste because now we can repeat it with fresh Brussels sprouts that we can buy from the farmer's market.

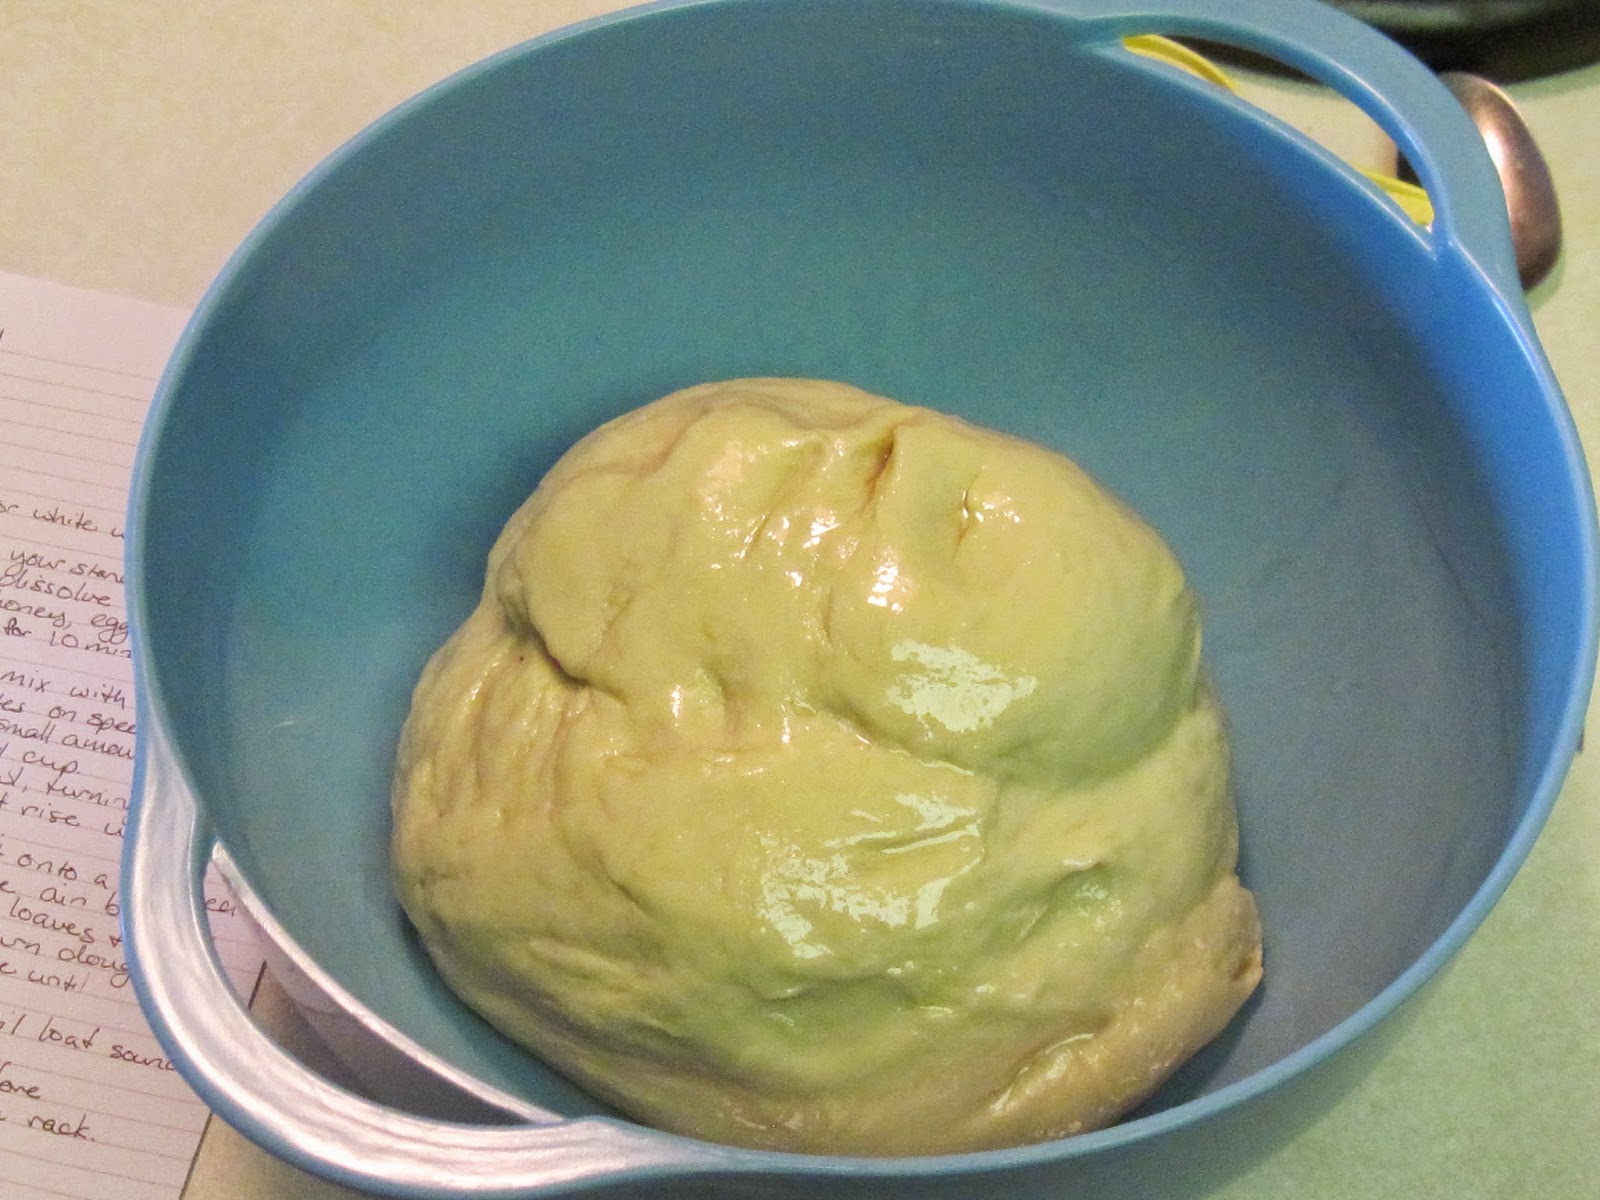
Between making bread and making dinner last night, I threw some cookies into the oven. They're just the usual Tollhouse recipe, but that's great for me--it's printed on the bag, so I'll never lose it. I made about half of the batch last night, and I froze the rest. I froze them in the appropriately sized scoops on a cookie sheet and then transferred them to a freezer bag. That way, when Tony and I decide we have a craving for something sweet, we can just make a few cookies rather than revisiting last night. (Last night, I made about a two dozen cookies, and we ate them all before the night was over.) Perhaps just making enough will help us practice moderation.


So last night, we had quiche, Brussels sprouts, homemade bread, and cookies for dessert. Tony really enjoyed the quiche. The only thing I might do differently is look for smaller pans so that we can make two. One for him and one for me with cheese since I did really miss the flavor that the cheese adds to the quiche. I think I'll be experimenting with making more quiche in the near future. It's pretty simple and fairly cheap to produce, and it makes a nice dinner. There are plenty of left-overs, which makes my life easier. I'd call yesterday's kitchen experiments a success, which makes up for the fact that dinner tonight will be leftovers since I have a horrible headache and a lack of motivation. I'll make up for it on Friday.

Yeast Bread

Bread is incredibly intimidating to me--not the eating of bread, of course, but the baking of bread. I confessed my fear of yeast in my post about beer bread. Yet, despite my love of being able to store-buy all the bread I want, I wanted this blog to be about trying new things and cooking things I love for the people that I love. Tony's food love has always been bread. (I'm pretty sure that if Tony had to choose between me and bread, I would need to be afraid.) So it only seems like a natural progression that I should begin making bread.

There are two things about making my own bread that I always found intimidating. First, the yeast. The process of not killing the yeast seems like a delicate balance. The water should be warm, but not too warm. It should bloom, but not too much. It just seems like such a tenuous stasis to maintain. Second, the kneading. Over-kneading can cause the bread to be tough and inedible. It just seems to me as though there are so many ways to screw it up.


Somehow, I came to the conclusion that making Tony feel special by making him fresh bread was more important than letting my fear keep me from trying something new. Love makes you do crazy things--like experimenting with yeast. I should confess that I still did this a little bit of the lazy way. I decided that since I have the serious, professional series KitchenAid, that I might as well use that to my advantage. I found a bread recipe that allowed me to use my mixer without really requiring me to do any kneading. You can find the recipe that I used here.


I was actually a little bit surprised at how hands-off this recipe really was. It was just a matter of making sure that I stayed on track with my time. I used the KitchenAid as recommended in the recipe and watched diligently for the ten minute mark to make sure that I wasn't  going to be over-kneading. The recipe mentions that you may need to add some extra flour, and sure enough, I did. I probably added about a quarter of a cup, and that was just the perfect amount.


This recipe called for a double rising process. So it rose initially, and then it was punched down, separated into two loaves, and rose again. Then, I baked it.


I was a little bit nervous because the rising processes didn't seem to create as much of a rise for me as it did for the blogger that I got this recipe from. I suppose I just figured that the worst that could happen was that I screwed it up, and that was pretty much what I was expecting from making bread anyways. The good news is that I proved myself wrong and ended up making some really delicious bread!


The bread ended up being a really moist and spongy bread. It was a little bit sweet since it's made with honey and coconut oil. It was easy to cut, and though it looks dark brown on the outside, it did not develop a crunchy crust. It was heavenly with a little bit of butter, and Tony and I ate it with dinner. Tony actually said that it's one of the top three breads he's ever eaten, which is high praise from the King of Carbs.


This experience really changed my mind about making bread at home. It turned out really wonderfully, and it wasn't a difficult recipe to follow. I'm not saying that I'm going to embark on a three day croissant-making endeavor or anything, but I'm not afraid to use yeast anymore. Tony has expressed an interest in making baguettes, and I think I'm finally ready to try that with him.